

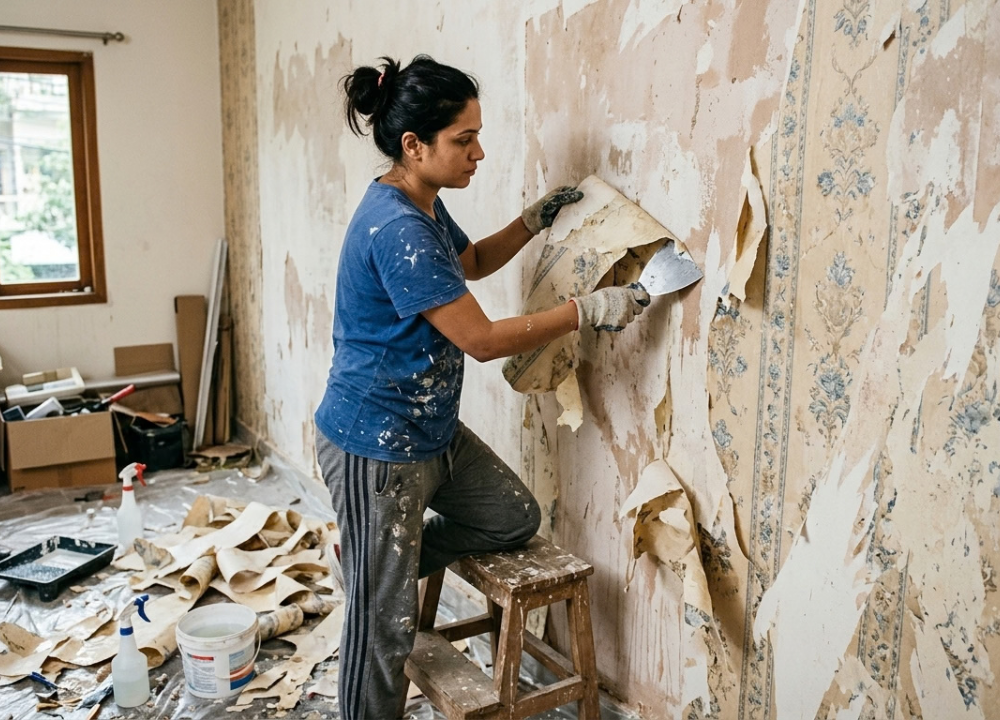
Old wallpaper can completely change the look of a room, but taking it down can feel like a bigger job than putting it up. The good news is that most homeowners can handle the project with basic tools, patience, and the right technique. The key is to understand what type of wallpaper you have and choose a removal method that suits both the paper and the wall underneath.
If you are planning to Remove Wallpaper, start by preparing the room rather than immediately reaching for a scraper. Protect the floor, move furniture away from the walls, and test a small section first. This simple preparation can prevent unnecessary wall damage and make the rest of the project much easier.
Whether you are dealing with peelable wallpaper, traditional wallpaper, vinyl wallpaper, or several old layers, this guide explains practical methods from basic peeling to steam-assisted removal. It also covers leftover adhesive, drywall protection, wall repairs, and preparation for painting.
What Is the Easiest Way to Remove Wallpaper?
For many beginners, the easiest approach is to first test whether the wallpaper is peelable. If a corner or seam lifts easily, you may be able to pull the paper away by hand. If the backing remains attached, warm water can help soften the adhesive before careful scraping.
A simple process looks like this:
- Prepare and protect the room.
- Test a small section of wallpaper.
- Peel away any loose surface material.
- Score or loosen stubborn sections when necessary.
- Apply warm water or an appropriate removal solution.
- Scrape away softened wallpaper.
- Clean remaining adhesive.
- Repair, smooth, dry, and prime the wall..
Tools You Need to Remove Wallpaper
Having the right equipment makes the work considerably easier. You do not necessarily need every specialized tool; many projects can be completed with inexpensive household supplies.
Essential Tools
A basic wallpaper-removal kit may include:
- Wallpaper scraper or wide putty knife
- Spray bottle or pump sprayer
- Bucket
- Sponge
- Warm water
- Drop cloths
- Utility knife
- Protective gloves
- Safety glasses
- Step ladder for high sections
Optional Tools for Difficult Wallpaper
For stubborn material, consider a wallpaper scoring tool or steamer. A scoring tool creates tiny openings in certain wallpaper surfaces, allowing moisture to reach the adhesive underneath. A wallpaper steamer can soften old adhesive with heat and moisture. It is particularly useful when several layers are present, although it requires more care around electrical outlets and delicate wall surfaces.
How to Prepare the Room Before Wallpaper Removal
Preparation is one of the most overlooked parts of a DIY wallpaper project. Spending a little time at the beginning can save considerable cleanup and repair work later.
Protect Floors and Furniture
Move furniture away from the walls whenever possible. Cover remaining furniture with plastic or protective sheets, and place drop cloths along the floor. Wallpaper removal can create wet scraps and adhesive residue, so floor protection is especially important when using water or steam.
Protect Electrical Outlets
Water and electricity should never be mixed. Turn off power to the relevant area when working around outlets or switches, and keep moisture away from electrical components. Remove outlet and switch covers if appropriate, following basic electrical safety practices. If you are uncomfortable working around electrical fittings, have a qualified professional handle that part.
Inspect the Wall
Before starting, look closely at the surface. Check for cracks, holes, loose areas, previous repairs, or signs that the wall is already damaged. If you notice significant damage, plan for repairs after the wallpaper comes down. Knowing what is underneath can also help you avoid mistaking existing damage for damage caused during removal.
Identify the Wallpaper Type First
One of the smartest ways to Remove Wallpaper efficiently is to identify the material before choosing a method.
Peelable Wallpaper
Peelable wallpaper is designed to come away relatively easily. Look for a loose corner and gently pull. If the paper separates cleanly from the wall, continue slowly. Do not assume every wallpaper behaves this way. Testing a small hidden section is safer than pulling aggressively across an entire wall.
Strippable Wallpaper
Strippable wallpaper may also come off in large pieces when pulled correctly. If the decorative surface separates while the backing remains, you will need to deal with the remaining layer separately.
Traditional Wallpaper
Traditional wallpaper is often attached firmly with adhesive. Moisture can help soften that adhesive, allowing the paper to be scraped away. The amount of water required depends on the paper, adhesive, wall material, and age of the installation.
Vinyl or Washable Wallpaper
Vinyl and washable surfaces can resist water. If water sits on the surface rather than soaking through, scoring may help expose the backing.
How to Remove Wallpaper Step by Step
Once the room is prepared and the material has been identified, you can begin the actual removal process.
Step 1: Test a Small Area
Start near a corner, seam, or less noticeable section. Try lifting the wallpaper with your fingernail or a scraper. If it comes away easily, continue with the same method. If it tears or refuses to move, stop and change your approach.
Step 2: Peel the Wallpaper
When the material is peelable, pull slowly and steadily. Avoid yanking it away from the wall because sudden force can pull away paint or damage the surface underneath. Keep the paper close to the wall while pulling rather than stretching it dramatically outward.
Step 3: Score Stubborn Wallpaper
If water cannot penetrate the surface, lightly score the wallpaper. The objective is to create pathways for moisture, not to cut deeply into the wall. Work over a small section at a time. This gives you better control and makes it easier to monitor the wall underneath.
Step 4: Soften the Adhesive
Apply warm water with a sponge or spray bottle. Commercial wallpaper-removal solutions can also be used when appropriate. Allow the moisture time to work. Applying more and more water immediately is not necessarily better. Excess moisture can create problems, particularly on drywall.
Step 5: Scrape Carefully
Once the adhesive has softened, slide a wallpaper scraper beneath the loosened material. Use controlled movements rather than digging the blade into the surface. If a section is not moving, soften it again instead of applying excessive force.
Wallpaper Removal Methods Compared
Different situations call for different techniques. The following table provides a quick comparison.
| Method | Best For | Main Advantage | Main Concern |
| Dry peeling | Peelable wallpaper | Fast and simple | May leave backing |
| Warm water | Traditional paper | Affordable and accessible | Excess moisture |
| Removal solution | Stubborn adhesive | Helps soften difficult glue | Requires product directions |
| Scoring + moisture | Vinyl or coated paper | Helps water reach adhesive | Can damage walls if too aggressive |
| Steam | Multiple or stubborn layers | Softens tough adhesive | Heat and moisture require care |
| Scraping | Loosened wallpaper | Removes softened material | Excessive pressure can damage walls |
How to Remove Wallpaper Without Damaging Drywall
Drywall requires particular care because its outer paper layer can be damaged by aggressive scraping or excessive moisture. When you Remove Wallpaper, avoid repeatedly soaking the same area. Let the moisture soften the adhesive, then scrape gently.
If the drywall paper starts lifting, stop and reassess the technique. A damaged drywall surface can require additional filling, sanding, sealing, and priming before it is ready for paint. A sharp scraper is not automatically a better scraper. What matters is controlled pressure and a softened adhesive layer.
How to Remove Wallpaper From Plaster Walls
Plaster walls are generally more resistant to moisture than drywall, but that does not mean they should be treated roughly. Test your method first. For traditional wallpaper, moisture or steam may help loosen the adhesive. For old wallpaper, you may encounter several layers that need to be removed separately.
How to Remove Multiple Layers of Old Wallpaper
Multiple layers can turn a simple project into a much longer process.
Start With the Top Layer
Try to remove the uppermost layer first. Once it is gone, inspect what remains. Sometimes the backing underneath can be peeled or soaked more easily than the original surface.
Treat the Remaining Backing
Apply moisture to the exposed backing and give the adhesive time to soften. Then scrape gently. Avoid trying to force several layers off simultaneously if doing so puts excessive pressure on the wall.
How to Remove Wallpaper Glue
Removing the paper is only part of the job. Adhesive left behind can cause bumps, uneven texture, or problems when you later paint.
Soften the Residue
Use warm water and a sponge to soften remaining adhesive. Work in small areas instead of soaking the entire wall.
Wipe and Scrape Gently
After the glue softens, wipe it away. A scraper can help with thicker residue, but use light pressure.
You may need to repeat the process several times for older adhesive.
Common Problems When You Remove Wallpaper
Not every project goes smoothly. Here are some common situations and practical responses.
Wallpaper Tears Into Tiny Pieces
This usually means the adhesive is still holding firmly or the paper is not being removed at the right angle. Try softening a larger area and working more slowly.
The Wallpaper Will Not Peel
Do not keep pulling harder. Test moisture, scoring, or steam depending on the wallpaper and wall material.
Mistakes to Avoid During Wallpaper Removal
Beginners often make the project harder by rushing. Avoid these common mistakes:
- Skipping the test area
- Using excessive water
- Scraping too forcefully
- Ignoring electrical safety
- Pulling wallpaper too quickly
- Leaving adhesive on the wall
- Painting before the surface is dry
- Failing to repair damaged drywall
- Skipping primer when the surface needs it
How to Prepare the Wall After Wallpaper Removal
Once you Remove Wallpaper, the wall is not automatically ready for paint. Proper surface preparation is essential for a smooth result.
Clean the Wall
Remove adhesive residue, dust, and loose material. Use a clean sponge and suitable cleaning method for the wall surface.
Repair Damage
Fill small holes, gouges, and imperfections with an appropriate wall-repair compound. For significant drywall damage, more extensive repair may be necessary.
When Should You Hire a Professional?
DIY removal can be practical for a small room, but some projects are better suited to experienced professionals. Consider professional assistance if you encounter extensive wall damage, many layers of old wallpaper, unusually difficult adhesive, very large areas, or concerns about the underlying wall.
How Long Does Wallpaper Removal Take?
The time required varies significantly. A small room with peelable wallpaper may take only a few hours, while a large room with multiple layers and stubborn adhesive can require substantially more time.
Factors include:
- Room size
- Number of wallpaper layers
- Type of wallpaper
- Adhesive strength
- Wall material
- Amount of wall repair
- Experience of the person doing the work
- Chosen removal method
Is Removing Wallpaper Better Than Painting Over It?
Painting over wallpaper is sometimes possible, but the condition of the existing material matters. Loose seams, peeling sections, damaged wallpaper, visible texture, or multiple deteriorating layers can create an uneven final result. Removing the wallpaper can provide a cleaner foundation when the underlying wall can be properly prepared. However, removal itself can damage fragile surfaces if done incorrectly. The condition of the existing wallpaper and wall should therefore be considered before deciding between removal and covering.
Final Thoughts
Learning how to Remove Wallpaper does not have to be intimidating. The most reliable approach is to identify the wallpaper, test a small section, and begin with the least aggressive removal method that works. Peelable wallpaper may come down with very little effort, while traditional, vinyl, or layered wallpaper may require moisture, scoring, or steam. Throughout the process, protecting the underlying wall should be a priority. After the paper is gone, take time to remove adhesive, repair imperfections, sand rough areas, and let the surface dry. A suitable primer can then help create a consistent foundation for your next decorating project.
FAQs
Q1: What is the easiest way to remove wallpaper?
Ans: Start by testing whether the wallpaper is peelable. If it does not come away easily, use an appropriate moisture-based method to soften the adhesive before gently scraping.
Q2: Can I remove wallpaper with hot water?
Ans: Warm water can soften the adhesive behind many traditional wallpapers. Results vary depending on the wallpaper and glue, so test a small section before treating the whole wall.
Q3: How can I remove wallpaper without damaging drywall?
Ans: Use controlled moisture, avoid excessive soaking, and scrape with light pressure. If the drywall paper begins to lift, stop and change your technique.
Q4: Should I use a wallpaper steamer?
Ans: A steamer can be useful for stubborn wallpaper and multiple layers. Because it produces heat and moisture, use it carefully and follow the equipment manufacturer’s safety instructions.
Q5: How do I remove stubborn wallpaper glue?
Ans: Soften the adhesive with warm water or a suitable removal solution, then wipe or gently scrape the residue away. Repeat the process instead of applying excessive force.
